The first thing I like to do is to dig out any fixtures. Here I've dug out the heater components.
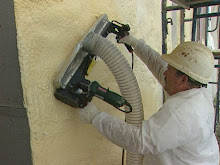
 Here I am in action, planing the wall.
 (NOTE: You may want to mute your computer or turn down volume before playing this video clip as it is live and full volume!)


 This is a profile picture of the sprayed foam before I planed it.
  This is a profile picture of the same wall after I planed it. I've placed a straightedge on it to check for low and high spots.
Once I assess the high and low spots, I then fine tune the wall and sculpt desired portions with a round brush (actually designed for grooming horses!).

This is a sculpted flare above the wheel well.

No comments:
Post a Comment