In the end I decided to go with a cream towards the top, a beige swirl pattern finish on the bottom and a blue grey in the dados. For your viewing pleasure, I present *drumroll* the finished look!


 I'm spreading the base coat on with a small trowel.
 Here I am trimming the grid work to cover the surface.
 Sometimes I need to build custom tools to get the job done. This tool is to perfect the base coat application in the dados.
 Here is a close up of the detail work around the wheel well.


 That's me at the end.

 Boy I would hate to be my neighbors. At least I'm adding a little color to an otherwise bleak winter landscape!
 I've set up a couple of stories of staging so I can easily spray the top of the motorhome.
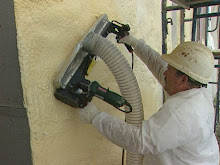
 I attached a hand curved metal mesh along the bottom edge. It also has foam board dams attached to it.
 Above the compartment, is a 6" x 10" block which is a sample of the wall system I intend to apply. Take a look at the sample and in your mind, replace the plywood with the metal exterior of the motorhome! Also, this compartment and all other exterior components have been built out to accomodate for the thickness of the spray foam. I actually had my buddy machine me a few mounting brackets for some of the components.
 Dams are applied around all windows and structural edges.


 I've also removed and blocked off a door and window as you can see. All remaining windows and doors will be treated with dams to hold the foam back. This is going to be a very energy efficient,
  warm or cool motor castle!